How To Start A Candle Business Of Your Own

Maybe you like smelling lavender-scented candles during your me-time or enjoy displaying beautiful candles in your home.

You may even have tried your hand at creating candles at home as a hobby.

Whichever way you appreciate candles, you’d probably agree that they are nice to have and beautiful to look at.

Candles make excellent home décor and gifts that people buy all year round. Thus, making and selling candles can be lucrative if you know what you’re doing.

Today’s blog post is a guide on how to start a candle business: considerations, requirements, and steps to take when you’ve decided to build your business.

Should You Start A Candle-Making Business?

A candle business can be profitable, as I’ve mentioned, but it may not be for everyone.

Here are some factors to consider before you decide to start making and selling candles:

Candle Making Laws

First, read up on your state laws and learn if your state allows you to manufacture candles in your home.

Aside from state laws, individual cities and counties may have conditions on such businesses, and zoning laws may not allow you to operate from home.

Thus, before you even decide to do it, be sure to check the fire safety regulations applicable in your area to ensure that you can do it.

Space to Make Candles

You can certainly start making candles at home, but make sure that you’ll have plenty of space for making the candles, as well as storing the materials and equipment you need.

If you don’t have space in your home, you might want to rent a nearby facility to use as a workspace, though of course, this will entail rental costs.

Investment Needed to Make Candles

You’ll have to invest at least some money into the raw materials and the equipment so you can start with your candle business.

As I’ve mentioned above, if you end up renting a workspace, you’ll have to consider that in your initial investment.

Research early about possible suppliers of materials and equipment so you can estimate how much you’ll need to invest.

If you don’t have money to invest in the business, maybe a candle business is not a good fit for you.

Candle Making Business Objectives

How much you’ll make is highly dependent on how big your candle business is, and the good thing about owning your business is that you can decide how big or how small you want it to be.

Figure out what you want to achieve with your business and keep a record of it so you can have that goal in mind in everything you do.

Ideal Customer

The bottom line is, what type of customer do you want to sell your candles to?

It’s good to draw up a profile of your ideal customer: their demographics, likes, dislikes, wants, and needs.

When you have a profile of your ideal customer, you can then weigh your candle-making skills and find out if you have the skills to meet your target customers’ needs and if not, if you’re willing to invest time and money to learn new skills and hone existing ones.

What You Need To Start Your Candle Business

If you’ve considered the factors above, and you’ve decided to start with your candle-making business, you’ll still need to put some things in order before you actually start.

Here are some of the things you’ll need to organize before you begin.

Market Research

As I’ve mentioned, knowing who you want to sell to is important so you’d know if you can meet their requirements.

This is why you need to do market research.

Market research is the process of gathering and analyzing data about a target market’s needs, preferences, and buying triggers.

Business Objective

The aim is to be able to draw a mental picture of your target customer so you can understand how they decide to buy something and form your business and marketing strategy around that.

We’ve previously covered the details of doing market research in another article.

Niche

In general, your target market is anyone who wants candles.

But different people want candles for different reasons.

For instance, there are those who buy candles as purely an emergency light source for an event such as a blackout.

There are those who want beautifully shaped candles for decorative purposes in their home.

Others want scented candles for aromatherapy, ambiance, or to mask pet or cooking odors.

Custom and novelty candles are for more specific niches. For instance, religious candles, photo candles, and holiday candles fall into this category.

Business Plan

A clear, concise business plan is necessary for you to chart your journey and help steer you toward achieving your goals.

We’ve gone into the details of creating a business plan in another article in our site.

Training

Candle-making classes are available in online learning marketplaces, such as Udemy.

Local classes may be a little harder to find (and maybe more expensive), but hands-on classes may be a better fit for you.

Even if you’ve been making candles as a hobby for a while, you can always hone and perfect your craft.

Practice

Candle Making

Quite simply, the more candles you create, the better you get at it.

As you get better at it, you’ll probably create some candles that aren’t store-worthy, but it doesn’t need to be a waste; you can give them out as free samples or sell them at a heavily discounted price.

Network

Local craft groups can also be good venues to meet other artisans and suppliers from whom you might require services.

For instance, you might meet graphic designers who can design your candle labels. Or you might meet suppliers of containers for your candles.

You can also meet with local groups of entrepreneurs and small business owners who can help you with tips on how to get your business going and how to set it up for growth.

If you’re looking for a more focused organization, the National Candle Association is a nonprofit organization that has a great resource website on the science of candle manufacturing, fire safety, and legal issues.

Raw Materials

Your raw materials will largely depend on your customers’ needs, so you don’t want to stock up on too much wax or too many wicks.

However, you will want to research all the best places to source your raw materials from.

Amazon carries pretty much everything you need to start, but you can also look at wholesalers, craft stores, and beekeepers for beeswax.

To give you an idea of what you’ll need to buy, here are some of the raw materials you’re likely to need.

Candle wax. The most popular wax in candles is paraffin wax, but many different kinds like beeswax, soy wax, palm wax, and gel wax.

You can buy many different dyes to color wax in many different ways.

Raw wax

Wick. There are many different materials of wicks: all-cotton, cotton-paper combos, wooden, paper-cored, metal-cored, and many others.

Certain types of wicks go better with certain candle materials, so research and experiment to find out exactly which combinations work best.

You can also buy accessories to make it easier to assemble your wicks: wick tabs, glue spot, wick bars, and wick pins.

Fragrance oils. There are thousands of types of fragrance oils, which you can blend in literally hundreds of thousands of combinations.

Some general categories of fragrance oils include earthy, citrus, fruity, floral, and spicy. For novelty candles, you can consider smells of food, random stuff, and even stinky smells.

Candle molds. The usual candle molds are made of aluminum and create typical cylindrical candles, like votive candles or tea lights.

For more artistic designs, there are customizable designer plastic molds, polyurethane molds, and clamshell molds.

Candle containers. Glass is the classic material for candle containers, as they come in all shapes, sizes, and colors.

For travel-friendly candles, candle tins are becoming an increasingly popular choice.

Equipment

Your raw materials may be the purest, best-quality ones, and your technique may be impeccable, but if you don’t have the right equipment, your candles will come out substandard.

Here’s a list to give you an idea of what equipment you would need.

  • Pouring pots
  • Bars, bowties, and glue dots for holding wicks in place where the cal
  • Wax melters and heaters
  • Candle molds
  • Thermometers

Workspace

Candle-making is an activity that necessitates enough space for assembly, storage, and packaging while adhering to fire safety requirements.

Make sure you have a fire extinguisher in your workspace that’s compatible with wax fires.

This early, read up on your city’s zoning laws and fire codes to ensure that your workspace is safe, not only for you but for the surrounding area.

How To Start A Candle Business

If you’ve made the decision to start this candle business, and you’ve arranged everything you need, then you’re ready!

Here’s a step-by-step guide on how to start your candle business.

1. Acquire all necessary licenses and permits.

As I’ve mentioned, running a candle business requires special licenses and permits, so you’ll need to get all of them before you start manufacturing your candles.

If you can, schedule an inspection with a fire safety officer so that you’re entirely sure that your facilities and workspace are up to fire safety standards.

Make sure you register with the IRS as well. Having a tax permit allows you to save tax on buying supplies and passes on the tax to your buyers, so make sure to register with the IRS to pay state and federal business tax.

2. Register your candle business.

It is advisable to register your company as a limited liability company (LLC) so you can disconnect your business assets from your personal assets.

In the off-chance that your candle business gets sued or bankrupt, your liabilities are limited to your company, and your personal finances can’t be touched.

3. Organize your business financials.

As I’ve mentioned above, your business and personal finances should be separate, so assert this separation by opening a separate business bank account and credit card.

Doing this establishes a credit line for your business that you can use for when you decide you want to expand the business.

In line with this, organize your bookkeeping records so that your personal expenses and business expenses are distinct.

You’d also need to get insurance for your company: general liability for cover against bodily injury, property damage, and personal injury.

If you need to hire employees at some point, you’ll also need to get workers comp.

4. Define your product offerings.

There probably are infinite types of candles that you can make, and you’re only limited by your creativity, skills, and raw materials.

You’d want to start with a limited product line, just so you don’t get too overwhelmed at the outset.

Here are some ideas to get you started:

  • Custom-shaped candles (e.g., animals, holiday figures, flowers)
  • Religious candles (e.g., Jewish-themed, Catholic-themed, Wiccan)
  • Embedded object candles (e.g., candles with seashells, flowers, glitter)

You can also make your product line one of a kind with the materials that you use.

The candle material, wick material, scent, and containers you use can all be combined in different ways to create a product line that’s unique to your brand.

Note that I said “unique”; make sure that your product line doesn’t infringe on any trademarks, copyrights, or patents of other candle companies.

It’s easy to make this mistake; after all, how many candle scents and names could there be?

But the burden is on you, the manufacturer, to ensure that there is no copyright breach.

Aside from selling the candles themselves, consider selling candle accessories that your customers may want.

Accessories include plates, warmers, wick trimmers, candle snuffers, wick dippers, and candle holders for additional income for you.

5. Test your products.

Normally, this would be lumped with the product creation phase, but since candles are higher risk items compared to other non-food products in terms of physical injury and property damage, the stakes are higher in terms of adhering to standards.

Make sure that your products adhere to the ASTM’s established standards of candle products.

Also, if you’ve developed your own scents for your candles, test the candles to make sure that your candles smell the way you intend them to smell.

6. Come up with a pricing plan.

At this point, you should know how much investment you’ve put into this business.

Monetary investments include money down for supplies and equipment (and space, if you’re renting it), license applications, training (if you need it), and other incidentals.

Aside from your monetary contributions, factor in your time in making the candles and assign a value to it. How much would you pay for yourself for each hour of work?

Finally, your artistry and effort need to also have values assigned to them.

It’s most effective to have a target profit per candle, so figure out the cost per candle based on the above values, add your target profit per candle, and you have your selling price.

7. Choose where to sell.

First, think about where you’re going to offer your products/services.

Selling your candles online is easiest, as there are plenty of platforms for you to choose from. The most popular ones are Etsy, eBay, and Amazon Handmade.

Here’s a good read if you’re debating whether to go with Etsy or eBay. And this is another great article on our site about selling crafts online.

If face-to-face selling is more your style, you can look for flea markets and craft shows where you can physically sell your candles.

You can also set up a storefront to sell your candles, like a mall kiosk to start or a larger space when you’re getting enough income to rent one.

Make sure your selling location is also compliant with fire safety standards.

If you’re going to have a physical location, register this location on Google My Business so potential customers in your area can easily find your business.

8. Establish your online presence.

If your candle business is going to be successful, you’ll need to build an online presence to make sure that when customers research about you, they’ll find information about you and confirm that you do insist.

First, open social media accounts for your business. Facebook, Instagram, and Twitter are the basic ones that your business should have.

While social media marketing is important for networking and advertising, aim to launch your own website at the same time, or at least very soon in the future.

Having your own website is a huge content marketing opportunity through a self-hosted blog and a newsletter if you have the time and motivation.

The next step is to set up a shop right on your website so you can sell your candles directly and not depend on third-party marketplaces, online and offline.

9. Organize your contact information.

First, create a business email so you can register your social media with that email and not your personal email. You don’t want to be flooded with emails on your personal inbox.

Also, you’ll want potential customers to be able to contact you in a variety of ways, not just email and social media.

However, just like you want your business finances distinct from your personal finances, you’re going to want your contact information distinct from your personal contact information.

If you’re working from home and registered as an LLC, you can technically have your home address listed as your business address.

The problem is that business addresses, called Registered Agent addresses for LLCs, are part of the public record.

I would imagine that you don’t want to have your home address publicly available, so you can either get a mailbox through UPS or look for a co-working space that offers the use of a street address as a mailing address.

Another thing you’ll want to take care of is a dedicated business phone number so you can turn it off during non-work hours. You’ll also want to have a smartphone by which you can do your social media updates and answer emails.

Final Thoughts On Starting A Candle Business

Running a candle-making business takes skill, dedication, and patience.

Of course, there is no guarantee that your business, or any business for that matter, will be successful, but I hope our guide on how to start a candle business helps you.

If you decide you don’t want to open a candle business but may want to open another business, you can go through this article with 50 ways to start an online business.

Or maybe all this post achieved was to convince you that starting a business isn’t for you, but that working from home is a better fit for you. Here is a list of jobs that you can work from home.

How does starting a candle business from home sound? Has my blog post inspired you to try it?

Share with us your stories below!

How to Start a Greeting Card Business in Just 4 Steps

So you want to learn how to start a greeting card business.

Making people feel warm and fuzzy with awesomely matched words and graphics is big business. These greeting cards are present in almost every occasion, from birthdays to funerals, anniversaries to job promotions, baby announcements, and even just day-to-day of expressing one’s love for another person.

Have you been a part of this industry as a writer crafting the words for greeting card companies? An artist making the graphics? A poet adding rhyme and rhythm to texts? Or are you inexperienced coming into the business?

Steps to Take to Start a Greeting Card Business

There are many questions to answer when figuring out how to launch any kind of company, which is why your first line of business should be to build a solid plan.

1. Create a Solid Business Plan

A business plan not only gives you a “map” to the business you want to build, it also helps you decide if you really want to pursue such a venture.

  • Money matters: How much money you can invest. If you have a partner investing on this idea, how much will he/she put into the business and how much of the income will be put back into the business.
    • Perform proper costing (list down cost of paper, printing services, artist fees, writer fees, and so on)
    • Amount range you plan to sell your greeting cards for
    • Amount you must set aside for paying employees or contractors like cartoonists, poets and so on.
    • Ongoing expenses to run your greeting card business (This could be anything from business insurance to printing equipment, desktop publishing software, computers, rental cost if you’re leasing an off, and so on)
  • Target market: Who is your initial target market? Do you plan to expand this to include other market groups?
  • Niche: Are you planning to focus on a niche for your greeting card business? For example, greeting cards with funny jokes, greeting cards drawn in a particular style, hand painted greeting cards, greeting cards handmade with buttons, greeting cards embellished with leaves or other nature’s trinkets.

Important Decisions to Make

Selling online, vs. selling in real life

If you decide to sell your greeting cards exclusively online, it will remove big expenses like office rental and upkeep of your own printing equipment. 

If you plan to sell in real life, think of the commitment level you’re willing to give.

Can you join artist markets and introduce your brand to the world, talking to would-be customers face to face? Of course, you can also sell both online and offline, if you wish.

Handmade vs. Print-on-demand

When it comes to greeting card design, you need to decide if you want to go the handmade route or print-on-demand cards.

Choosing between these two methods will affect everything from your business plan, to production, selling method, and even marketing.

The main benefit of going the handmade route is you’ll attract a very specific target market who value how artists do it old-school.

Every card is undoubtedly special.

However, producing these cards require a lot of time and effort in the artist’s part, which means there will be less cards produced and less income made.

Print-on-demand greeting cards begin just like any handmade card, but once the first card is designed, it will become the prototype for future cards and only printed when a buyer decides to pick a design from your greeting card catalog.

2. Make Your Business Legal

You may be starting a business that revolves in creativity, but you must still take care of the legalities:

  • Name Your business. Know that the legal name can be different to the brand you’re going to use throughout your greeting card business. But picking one that resonates with your product should be your main goal.
  • Establish a business entity, such as corporation, LLC, etc. This prevents anyone from suing you as an individual (and sue your company instead).
  • Get ready to pay taxes. Before you can run your greeting card business, you have to apply for an EIN via the IRS website.
  • Secure a permit. Check with your city or state what kind of business license you’d need to operate your greeting card business. This is super important because delaying a business permit could lead to paying fines, or worse, get shut down.
  • Open a business bank account. This separates your finances as an individual and as the business owner of your greeting card company. If you can secure a business credit card while you’re at the bank, do so. It could help with future expenses and build your company’s credit history.
  • Get insured. If you plan to hire employees or rent an office, it is important that you get business insurance. It will prevent would-be headaches in the future.
  • Set up the company’s accounting. Learn how to do your own company’s books at the earliest stage of your company’s life, so you’d be able to keep an accurate and detailed record of your company’s revenues and expenses.

3. Begin Branding

Now that we finished the serious side of how to start a greeting card business, let your creativity fly free with branding and brainstorming card ideas, themes or collections.

“Branding” means promotion of a product or company, so why would be begin branding before actually creating the product? You’ll see.

There are 3 important things you should do first:

  1. Build a website – It’s very easy to build websites these days, especially if you choose the drag-and-drop, hosted sites like Shopify, Wix, Squarespace, and the like. Joining any of these sites is easy. Just register, pay for a plan, choose a website template, and within an hour or two, you have a working website. You can even add a shop to your website.
  2. Build your company’s online presence – The easiest way of marketing products (without any investment) is through social media. Join the big 3 – Facebook, Instagram and Twitter. Set-and-forget LinkedIn. And turn Pinterest into your catalog of greeting cards.
  3. Print business cards and samples of your product – If your goal is to sell greeting cards beyond the internet, you should be armed with business cards whenever you join art bazaars, artist conventions and other similar events.

Make sure you use the same business name for all 3 tasks. You want people to know your greeting card business, so using different names for every platform would just confuse your potential market. Be consistent. Decide a voice for your company (formal? conversational? Not-safe-for-work? Too cool for school?) and then stick to it all throughout your channels.

4. Get Cranking with Crafting and Selling Greeting Cards

Everything we learned about how to start a greeting card business boils down to this.

  • Brainstorm ideas. If you’re hiring talent to do the artwork and text for your greeting cards, then begin brainstorming with them. If you’re the one drawing, then you just need to turn those ideas into something tangible.
  • Create a content calendar. Your goal as a business owner is to produce greeting cards enough to meet deadlines, seasons and holidays. You have to organize your staff so that you’ll be able to release Valentine’s Day greeting cards on time, or produce Christmas greeting cards two or three months before December.
  • Create, create, create. If you’re doing traditional greeting cards, you need to gather your supplies (paper, markers, paint, watercolor, etc.) and just create the cards you’ve brainstormed. If you’re making a digital version, then you just need a computer, drawing tablet, and the right software to do the job for you.
  • Printing greeting cards. This depends largely on how you wish to sell your greeting cards. If you’ve already talked to a publishing house where the greeting cards will be sold, then you have to print them on a massive scale. If you’re selling them one-by-one directly to customers, you have several options:
  • Continue promoting your stuff. While creating greeting cards, you should be consistent in updating your website, Facebook, Pinterest and other platforms. These will serve as free advertising for your business. Plus, it would let customers know that you’re open for business.

Wrap Up: How to Start a Greeting Card Business Successfully

A greeting card business can be launched completely from your home, much like these 50 ways of starting an online business.

You can control how small or how big you want to launch your company.

In fact, many small businesses begin operations on a part-time basis, then scale up to full time and gradually bring it out into the world when the company’s finances are stable and ready for expansion.

You may think that the $1 to $5 price tag of greeting cards won’t lead your business into success, but think about this for a minute: every time a greeting card is created under your wing, this card can be sold multiple times online and offline.

It won’t become a $20-billion Hallmark company, but since you’re running a passive income generating business, its earning potential is endless.

How To Start A Catering Business From Home

If your home-cooked meals are a hit with your family and friends, you may have wondered if you can start a home-based catering business.

Wouldn’t it be nice if you can turn your love for good food and cooking into a nice little income or even into a catering business?

Today’s article is a guide on how to start a catering business from home: how to decide if it’s right for you, everything you need to start, and how to establish your business.

Should You Start A Catering Business?

A catering business involves preparing and providing food at events, parties, and other large gatherings.

It’s very different from preparing food for your family for the holidays and simple get-togethers with friends.

Here are some of the most important factors to consider before you start your catering business.

Laws

First, find out if your state allows a home-based cooking business. Aside from state laws, individual cities and counties may have stipulations on such businesses, and zoning laws may not allow you to operate from home.

Thus, before you even decide to do it, be sure to check all of the food regulations applicable in your area.

Facilities

Kitchen Catering

If your state is able to give an in-home catering business license, it comes with very strict requirements, as everything food-related should be.

In general, the kitchen where the food for catering is prepared should be separate from all living areas by a door.

Plus, all storage areas (i.e., freezer and refrigerator), utilities, and ingredients used to prepare food for catering must be completely separate from those used to prepare food for those who are living in the home.

Investment

In terms of food businesses, a catering business costs less than a restaurant in terms of initial investment, but you’ll still need at least some initial equipment to get started.

Take inventory of the equipment and cookware you may already have and canvass the best deals for the equipment you’ll need to get started.

If you don’t have enough cash, maybe it’s not yet the right time to start your catering business. If you want, you might like to try online jobs that don’t require an investment first so you can save up for capital.

Keep in mind, though, that a catering business can net you between $30,000 and $80,000 a year, depending on costs and how large the catering jobs are.

Business goals

The good thing about a catering business from home is that you can choose to grow your business to cater to bigger events or you can keep your business small and manageable and earn a constant income.

Figure out what opening this business will help you achieve so you can keep your eyes on the goal.

Ideal customer

You’ll want to have an idea of the type of customer that you want to serve food to.

When you have a profile of your ideal customer, you can then weigh your culinary skills to meet your target customers’ needs.

It is particularly important in the food business to please your customers because a single meal can make or break your reputation as a caterer.

Steps to Take to Start A Home Catering Business

Are you now absolutely, 100% sure that you want to do this?

If yes, then here’s what you need to put together before you start your catering business from home.

A Niche

All businesses have to have their own niches to capture.

But finding your niche is especially important in a home-based catering business because keeping your marketing focused and costs low is a priority for start-ups.

Narrow your focus on a particular cuisine and/or certain kinds of events.

For example, if you’re an expert in grilling, you can specialize in barbecue catering. That way, you have a clear marketing focus on a target market, plus you can focus on buying equipment centered around grilling and not much else.

Grilling food

Other niche ideas are cocktail party catering, kosher catering, and brunch catering.

You can also specialize in special diets: vegetarian, vegan, gluten-free, nut-free cuisines are increasingly in demand.

Market Research

A catering business can certainly be profitable, and you’ll want to find out everything you can about the niche that you want to target to make sure you’re competitive and meet their needs.

Market research is the process of gathering data about a target market’s needs, triggers, and preferences, and analyzing this data so you can figure out who to offer your catering services to, what you can offer them, and how to offer your services to them.

We’ve covered the details of doing market research in a previous article.

A Business Plan

A clear plan is critical to the success of your catering business.

The basic points to consider are your target market, your financials, and your overall goals.

We go into the details of creating a business plan in another article on our site (plus, you get to learn about another business idea from home).

The Right Equipment

The niche you select will have plenty to do with the equipment you’re going to purchase for your catering business.

First, you’d need kitchen equipment, which includes cookware, chef knives, and food preparation equipment such as a peeler, a blender, and a food processor.

You’d also have to get food storage equipment, like a large refrigerator and upright freezer.

Next, you’d want to have your stoves, grill, oven, sandwich maker, microwave, and any other implements to cook your food.

Also, you’d want to have disposable materials that are crucial for food safety, such as food-safety gloves, mouth shields, aprons, and hairnets.

You’d also need dedicated cleaning supplies for your work area and surfaces where you prepare food: cleaning and disinfecting solution, mops, cleaning cloths, scrub brushes, and sponges.

Servingware, where you plate and present the food you prepared, is another important equipment to get; presentation is a big part of the appeal of food.

Catering equipment

Serving supplies such as china, glassware, utensils, linens, tables, and chairs can be rented if you want to keep costs down to a minimum, but you can certainly purchase these later.

Food containers are necessary as well for transport to and from your kitchen to the venue.

Lastly, you’d need food transportation equipment, such as a van or a small truck and food cabinets for hot food and coolers for cold food so you can keep the food temperature constant before serving.

State-Mandated Training

To be clear, you can be a caterer whether or not you have a diploma or even have gone to culinary school.

But you do have to take up mandatory food-handling courses provided by your state.

These are series of courses of four to eight mini-courses that instruct about how to store food properly, heating and cooling requirements, correct sanitation methods, and other specific requirements of the state.

Other Training

Just because you’re running a catering business doesn’t mean you’ll be dealing with food all of the time.

You’ll also be dealing with customers, suppliers, and employees, if you decide to hire people down the line.

Learning administrative, managerial, and customer service skills before you officially start your catering business would be a great help to your success.

Experience

It’s going to be more advantageous for you to work in a restaurant or any other food-business for a few weeks or months before you start your catering business.

But if your schedule or anything else doesn’t permit you to, at least cook some sample dishes for your friends and family and ask them for their honest feedback.

Network

Attend trade fairs to meet caterers and restaurant owners as well as suppliers of equipment and ingredients.

Also, you can join local or state associations of caterers and restaurant owners so you can get updated about your competitors and the latest trends in the industry.

Workspace

At this point, you should be sure you know what the state and city requirements are for your kitchen space, so before you even apply for your first license, you need to configure your workspace so that you meet all the requirements for a license.

How To Start A Catering Business From Home

So you’ve decided that you want to open this business, and you’ve prepared all you need to prepare.

Here’s how to start a catering business from home.

1. Obtain all the necessary licenses and permits.

Your catering business must be licensed as a Food Service Establishment, which your local health department provides.

Before you can acquire your license, a compliance officer needs to inspect your workspace and kitchen to determine if it meets all the necessary requirements.

Also, if you intend to serve alcohol, either with your meals or by offering bar service, you’ll need a liquor license as well, so keep that in mind when you’re preparing requirements for your license.

If you plan to hire employees in the future, you also need to make sure that you meet Occupational Safety and Health Administration (OSHA) requirements.

2. Register your catering business.

It is recommended that you register your company as a limited liability company (LLC) to separate your business finances from your personal finances.

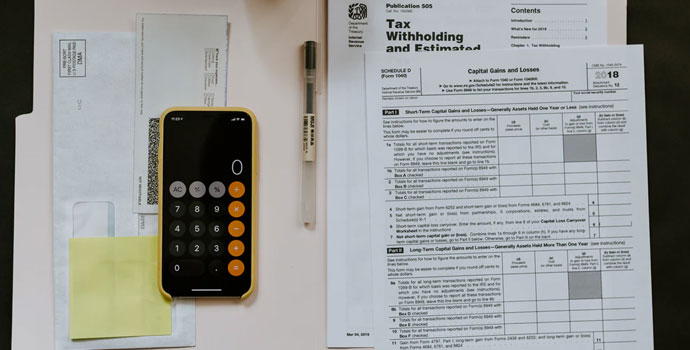
Tax Forms

You’ll want to protect your personal assets from liability in case your catering business gets involved in debt or litigation, so it’s also advisable to open separate bank accounts and credit cards for your business
.

3. Organize your business financials.

Once you’re registered as an LLC, you can open a separate business bank account and credit card, which not only asserts the separation of your business and personal finances but also establishes a credit line for your business that you can utilize when you’re in a tight spot or when you decide you want to expand the business.

Aside from separate bank accounts, you want your business books and personal books to be separate as well. Set up an accounting record of your business as soon as you get your LLC status.

You’ll also need to register to the IRS to be able to pay state and federal taxes, as well as to be eligible for tax breaks.

Another thing you’ll have to register for is insurance: general liability to be covered against bodily injury, property damage, and personal injury, commercial auto insurance, and workers comp if you decide to hire employees at some point.

4. Create your catering menu.

You can offer buffet-style dining or a sit-down plate service, depending on your niche as well as your clients’ preferences.

The best way to offer dishes is to create catering menus that clients can easily choose from as well as customize.

When building a catering menu, you need to take into account the cost per plate (i.e., total food cost divided by total number of guests), labor hours, materials cost, and how much profit you can reasonably tack on (around 10% to 12% of total costs, not just food costs).

Pricing can be a delicate art, and you might not get it right the first few times, and that’s why you need to compare your prices with local competitors to make sure you’re not being overly aggressive or you’re not undercutting yourself.

5. Set up your calendar.

A perk of running a catering business from home is that you get the flexibility to decide what days of the week you want to cater, as well as which hours of the day.

You can target the busiest period for your niche and work as frequently as you can and then take a rest during nonpeak, or you can continue catering for another niche.

For instance, if you’re targeting weddings or wedding-related gatherings (e.g., engagement parties, rehearsal dinners, stag or hen parties, etc.), the wedding season is considered to be May to October in a year.

6. Establish your online presence.

Yes, catering is more of personal business, but before anyone books your service, they’ll research about you, and one of the first places they’ll go to is on the internet.

Start by getting on social media. Facebook is good for targeted advertising, while Instagram is good for showing off high-quality photos of your food.

Social media marketing is important, but aim to launch your own website at the same time as your social media or at least soon.

Aim to create a website where customers can reserve a date and even pay a reservation fee through various channels.

But even if you don’t end up having this feature, merely having a website is a big marketing and promotional opportunity for your catering business.

7. Organize your contact information.

Just like you want your business finances separate from your personal finances, you’ll want your business contact information separate from that of your personal contact information as much as you can.

It’s a little bit tricky because you’re working from home, and technically you can have your home address listed as your business address if you’re registered as an LLC.

The problem with this is that business addresses, called Registered Agent addresses for LLCs, are public record, and if your home address is made public, you’ll tend to receive plenty of junk mail or maybe even have unwanted visitors.

To keep your home address private, you can either get a mailbox through UPS or look for a co-working space that offers the use of a street address as a mailing address.

Another contact information you have to take care of is a dedicated business phone line. This is easier to take care of than getting a street address.

You’d want a business phone that you can turn off during your non-work hours as well as a smartphone by which you can post and update your social media.

A separate business email is also advisable, although that should be taken care of if you set up your own website.

Starting A Catering Business From Home: Additional Tips

To be a go-to caterer, you’ll need to be reliable, punctual, trustworthiness, value for money, variety of food, professionalism, and proper decorum, especially for formal events.

Of course, there is no guarantee that any home-based catering business will be successful, but culinary skills, passion, and determination will go a long way.

Maybe all this post achieved was to convince you that starting a business isn’t for you, but that you’d like to work from home. Here is a list of jobs that you can work from home.

Are you thinking of starting your own catering business from home? Did my article inspire you to give it a go? Tell us your stories in the comments below!

How To Start An Embroidery Business: The Basics And More

Embroidered garments and accessories have been in style and in demand since the dawn of history, and they remain popular even now.

Whether you have a passing interest in embroidery, or it’s already a hobby for you, you probably want a piece of the potential profit from getting into the embroidery industry.

Here’s a guide on how to start an embroidery business: what you need to consider beforehand, what you need to prepare, and how you can establish your business.

Should You Start An Embroidery Business?

An embroidery business can definitely be profitable, but it may not be for everyone.

Here are some factors to consider before you start.

Space

Basic embroidery machines take up very little space; some are as small as an end table.

However, you have to have space for the other materials you need as well as your finished products for selling or for delivery.

Think about whether you have enough space in your home or in your garage for all these, or if you’ll eventually need to rent a space.

Costs

Will you be able to spring for the initial cost of the machinery and raw materials?

These do not cost much: a basic embroidery machine costs as low as $500 and a bobbin wound with 145 yards of white polyester thread costs as low as 18 cents.

But if you don’t have extra income to cover even that, then starting an embroidery business may not be for you.

Business objectives

Despite the many apparel decoration methods available (e.g., silkscreen printing, heat press, and direct-to-garment printing), and advances in the technology involved, embroidery will always stay in demand.

Embroidered Shirt

However, if you’re more knowledgeable or comfortable with other technologies apart from embroidery, then embroidery may not be a great place to start your apparel business.

Nevertheless, nothing can stop you from expanding your offerings to include other apparel printing types so you can target a more diverse target audience.

Ideal customer

Speaking of your target customer, it’s good to have an idea of who your ideal buyer is.

When you have a profile of your ideal buyer, you can assess yourself and decide if you have the skills and vision to meet your target customers’ needs.

What You Need Before You Start Your Embroidery Business

Once you’ve decided to go ahead with it, you’ll need to do some things first to prepare.

Here are the steps you need to take to ensure you’re prepared to open your embroidery business.

Self-Learning and Networking

You don’t have to have a college degree to start an embroidery business, but you do need to know plenty and you need to be updated.

Learn as much as you can about the apparel industry and especially the custom embroidery segment of that industry.

There are embroidery and custom apparel associations you can join to get the latest industry news and trends.

Look for trade shows to attend so you can network with suppliers and other business owners for advice on where to get the best supplies and how to run an embroidery business.

Read up on custom embroidery through online articles, journals, and books to learn the right techniques and the most current designs.

Most importantly, practice the skills necessary for this business: embroidery and design, as well as business management and marketing skills.

Market Research

Market research

“Market research” sounds intimidating, but it doesn’t need to be.

Market research is the process of gathering and analyzing data about a target market’s needs, triggers, and preferences.

The aim is for you to know who to offer your embroidery services to, what you can offer them, and how to offer your services to them.

The first thing you need to do is to draw up your buyer persona, which is a general, hypothetical representation of your ideal customer.

The point of this exercise is to be able to visualize who your target customer is so you can understand how they make their purchasing decisions and form your business and marketing strategy accordingly.

Discussing how to make a buyer persona will take up much space in this post, so here’s a guide on how to create a buyer persona.

An example of a niche you can go into is the commercial market, where you create embroidery for uniforms, corporate giveaways, or marketing materials.

Another example of a niche is the private market, where you make custom embroidery for personalized clothing, gift items, events, or parties for individuals.

There may be other niches that you can tease out during your market research that you might want to target.

Business Plan

A business plan is one of the most important documents that you’ll ever create and possess related to your embroidery business.

A written, well-organized business plan helps give your business a clear direction and how you’re going to achieve your goals.

That said, it doesn’t have to be formal unless you’re going to submit it as a requirement to get a small business loan.

It doesn’t even have to be 100 pages; who would read such a long document?

As long as it is easily understandable and all of the essential information is included, that’s an acceptable business plan.

Remember that you’re going to refer back to your business plan from time to time, and you should also be able to edit and refine this document as your business changes and grows.

Keep this document where you can easily access it anywhere, anytime, preferably in a cloud drive.

Here, in a nutshell, are the essential elements that you need to include in your business plan:

  • Executive summary
  • Company profile
  • Organization (when you do expand your business and hire employees)
  • Market research
  • Product/Services offered
  • Marketing plan
  • Financial plan

The executive summary is your business in a nutshell: who you are, what you offer, and your target market. If you can, limit this to one or two sentences.

While this is the first thing that readers will read on your business plan, it’s advisable to create this last. After all, this is a summary of everything else on your business plan.

Embroidery Business Plan

On the other hand, the company profile is a bit more detailed description of your business, the specific products and services you offer, details of your target market, and your advantage over your competitors.

Running an embroidery business can be daunting, especially if you handle all the steps from sales and marketing to design, creation, shipping, and aftersales.

You’ll probably hire some people to work with you at some point, and when you do, include an organizational chart to your business plan.

Details of your market research would certainly be needed in your business plan to establish who your target audience is, what their needs are, and how their problems are being solved by your competitors.

Your business plan should also include a complete, detailed list of the products and services you’re offering.

As your target market’s needs evolve and your business evolves, you should be able to add and remove items on this list.

Your marketing and sales plan should include how you plan on reaching your target market and selling to them, your promotion strategy, your pricing plan, as well as partnerships you plan to make, if any, to help further your business interests.

A typical financial plan should have a sales forecast with your gross projected income and your direct costs that eat into the income.

Also include your indirect costs, which are expenses that are associated with running the business, such as rent and utilities. Marketing and promotional costs are also normally included here.

Aside from these sections describing your business, bear in mind that you need to express your passion and dedication.

Don’t hesitate to state your values, challenges, strengths, and what makes you stand out from your competitors.

Even if you’re the only one who ends up reading your business plan, rereading it and reconnecting with the passion that you have for your business allows you to get your bearings back when you’re feeling lost.

Embroidery Machine

Here are some factors to consider when shopping for the best embroidery machine for your business.

  • Brand
  • Value for money
  • Ease of use
  • Automated processes
  • Embroidery area
  • Connectivity
  • Compatibility with digitizing software
  • Warranty
  • Support and training

Name brands of embroidery machines tend to have the best features and aftersales support, but just because a machine is expensive doesn’t necessarily mean it’s the best.

Consider what you’re getting for the price you’re paying. You may be paying too much for too few features or features that are of no use to you.

Also consider how easy the machine is to use, and which processes are automated, such as automatic thread tension and cutting, needle threading, bobbin winding, and other minor processes.

These may seem frivolous, but the time you take to do all this manually is time that you could have put into actual embroidery.

Another largely overlooked feature is the embroidery area. A bigger area allows you to create larger designs and gives you the space to create more complicated designs.

You’ll also want an embroidery machine that has plenty of connectivity options to a computer for uploading designs.

At the very least, it should have a USB connection so you can use a thumb drive or connect it directly to a computer.

Wireless connectivity is an obvious plus, but if you’re going to be working in close quarters with a single machine, then a USB connection should be enough.

Because everything is digital now, another feature you should be looking for is how compatible your machine is with digitizing software so you can work with digital designs.

Don’t forget to check out the warranty that’s included in your purchase and what’s covered. Also, consider whether they cover shipping costs for replacements and for repair jobs that have to be done in their facilities.

Customer service is another aspect to consider; what channels are available during what hours, and whether they’re genuinely helpful and reliable.

Of course, even the best embroidery machine would be useless in the hands of an unskilled operator.

Make sure you train yourself in the use of the machine that you end up buying. Take advantage of available training, whether free or paid, online or offline.

Raw Materials

Your raw materials will largely depend on your customers’ needs, so you don’t want to stock up on too many spools and bobbins of embroidery threads and too many needles.

However, you’ll want to research all the best places to source your raw materials from.

Amazon carries pretty much everything you need to start, as well as on an as-needed basis.

Gunold is another online store, but this one specializes in discount embroidery supplies. They also offer a wealth of resources and workshops to help you hone your embroidery skills.

How To Start Your Embroidery Business

At this point, you’re probably feeling like you’ve run a couple of marathons.

But it’s worth putting everything in place so you can get off to a great start.

Here’s how to (finally) get started with your embroidery business.

1. Register your business.

You can hold off on this for later, but it’s advisable to get the proper licenses and registration as early as you can.

Registering as an LLC is recommended because then, your liability is limited to the amount of your investment in the business, and you needn’t dip into your personal savings fund if you ever get into debt or litigation as long as you’re careful to keep separate records.

Remember that embroidery is a creative job as much as it is a labor-intensive one.
Being registered as a business also gives you the advantage of being able to apply for copyrights and other intellectual property claims for your designs.

Register with the IRS as well so you can take advantage of the tax benefits as well as wholesale prices from suppliers.

The requirements for getting licenses differ for each state, so call your local government offices to know exactly what you need to file and submit.

2. Determine your pricing strategy.

Creating a pricing strategy can be a bit sticky, especially for an embroidery business, which deals in custom, personalized outputs.

Price tags

When drawing up a pricing strategy, remember these factors that you should consider: the price of the raw materials, the complexity or intricacy of the design, the actual size of the design, and how much time it will take to finish.

Of all these, it’s the time to do the job seems to be the most overlooked, so what you can do is to have a target profit per hour in mind, then factor in all the other costs to come up with a fair price.

3. Decide what to sell.

When you’re starting from scratch, you’ll want to probably start with a few small projects first to build your confidence and show off your skills.

Small projects include patches to attach to clothes, or small garments and items, such as onesies, handkerchiefs, face towels, coasters, holiday stockings, and other such items.

And then you can move on to larger projects like embroidered shirts, jeans, and dresses.

However, there are plenty of embroidered items for sale on other stores, so the ultimate goal really is to get orders of personalized items with custom designs, either for corporate clients or individuals for holiday gifts and events.

4. Choose where to sell.

First, decide if you’re going to offer your products/services online, locally, or both.

You can sell your projects on a number of online platforms, such as Etsy, eBay, and Amazon Handmade.

Here’s an interesting read if you’re debating whether to go with Etsy or eBay.

If you want to set up a physical storefront instead of or in addition to your online shop, set up your space accordingly.

Make sure that aside from your embroidery machine, your materials, and your basic office (laptop plus files), you have a suitable place to display finished work and to entertain customers who want to commission embroidery.

Also, if you’re going to have a physical location, it’s advisable to register your embroidery business on Google My Business so that potential customers in your area can easily find your business.

5. Set up your online presence.

Given the world we live in now, an online presence is an absolute necessity for any business that wants to be successful.

Whether or not you decide to conduct business online, your possible customers are expecting to be able to research you and connect with you online.

However, don’t feel you need to sign up for all conceivable social media sites. Embroidery is very visual, so show off your work on visual platforms like Instagram and Facebook.

Social media marketing is very important, but having your own website, whether or not you turn it into an e-commerce site, is going to open plenty of marketing and promotional opportunities for your embroidery business.

6. Organize your contact information.

The basic principle is to keep your personal contact information separate from that of your business as much as you can.

Technically, you can have your home address as your business address, or your so-called Registered Agent address.

The only problem with this is that Registered Agent databases are public record, and I imagine you wouldn’t want to have your home address made public.

To keep your home address private, you can either get a mailbox through UPS or use the address of a co-working space.

You can also hire a virtual business address service that provides a physical address as well as a mail scanning service that weeds out junk mail and sends you digital copies of the important ones.

An easier hurdle is getting a dedicated phone line for your business.

You’d want a business phone that you can turn off when you’re not working as well as a smartphone by which you can do social media updates.

A separate business email is also advisable, though that should be taken care of if you set up your own website.

Starting An Embroidery Business: The Bottom Line

An embroidery business is one that does not require any bachelor’s degrees or formal training; the quality of your work speaks for itself.

Hopefully, today’s article has inspired you to start your own embroidery business today.

Embroidery isn’t the only business you can run online. Here are more online businesses to consider starting.

If you’ve changed your mind about starting a business and are only looking to work from home, here are 90 work from home jobs you can try your hand at.

Did this article make you want to start your own embroidery business, or did it make you realize you want something else?

Tell us your stories below!

Here’s How to Start a Home Based Floral Business

If you’ve always had a green thumb and is thinking of branching out as a business owner, a home based floral business may just be the ticket to get to your goals.

The cool thing about starting businesses from your home is that you can start slow, gradually expand your business, which means you can begin without investing a ton of cash head on.

Pros and Cons of a Home Based Floral Business

Before you learn the step-by-step of building your flower shop, you should first be aware of the pros and cons of this line of business.

PROS:

  • Be your own boss
  • A timeless industry – Not a fad, not season-based, flowers are used as gifts all year-round
  • Expand on your own pace – You can start small, or start big. It depends on your commitment, resources, time, and other factors, but it’s always good to know you have options.
  • Opportunity to break into other industries – Aside from selling flowers, you can also branch out into wedding flower arrangement business or offer educational classes about horticulture (or in this case, floriculture).

CONS:

  • Work long hours – Being a floral business owner means you begin super-early (3-4am) and end the day late to close shop.
  • Labor intensive – Having a flower shop is physically demanding.
  • Competitive – Some big flower shops, such as those you find in the supermarket, can be hard to compete with. You need to bring a new twist or offer to the table to attract customers.
  • Short life of flowers – Like the food industry, dealing with flowers means there’s always a chance of waste if the products aren’t bought within a particular time.

Now that you have a more realistic expectation of running a home based floral business, here’s everything you need to learn, from the skills you should have, to day-to-day operations.

10 Things You Need to Start a Home Based Floral Business

You might be planning to run the business from home (and feel comfy enough), but it has to be a legitimate business, which includes most of these things:

1. Market Research

Conduct proper market research before starting your business.

You need to make a list of your competition within the city you’re planning to provide services for. Learn about their history (how long they’ve been in business, who are their target market, and so on).

Ask around for people’s ideas. Look for a niche or vacuum that hasn’t been done. Is your area full of flower shop storefronts, but no one offering floral arrangement for non-funeral events?

Gather as much information you can before diving into the floral business head on.

It would save you a ton of trouble.

2. Business Plan

A business plan gives you a to-do list, an objective, a future plan about the financing or expansion of your business.

Even if you’re just starting out, a business plan allows you to prove the feasibility of your business idea (and even get funding from the bank or a partner).

3. Legal Filing

Like any kind of business, whether you have a storefront or not, you need to fulfill certain paperwork to make your shop legit. These include:

  • Business permit from your county and city
  • License to operate (if needed)
  • Business bank account
  • Accounting software to help make bookkeeping easy
  • Official contact numbers (landline and mobile)
  • Official website

The last step of becoming legit is deciding on a name. Your flower shop’s name will represent your brand and your company. Pick one that people can relate to and easily associate your products.

Choosing a name like “Purple Power” will confuse people on what you’re offering, so stick to something simpler like “Jane’s Flower Power House” or “Jane’s Floral Shop.” You can even use a keyword with location, such as “New Jersey’s Favorite Flower Shop.”

4. Money

If you wish to be 100% in control of your business, then you have to be the only one putting money into it.

You can do this by using your savings, or seeking a bank loan.

The amount of money you need will vary significantly, but the biggest chunk would have to be for renting or renovating the store location. And since we’re talking about building this start-up from your home, you’ll can skip this amount entirely (unless you rent the place you’re residing).

If funding the business on your own is not possible, you can also consider finding a partner who would invest half or a third of the initial fund needed to launch the business.

5. Training & Knowledge

There is no formal education or training required to run a floral shop, but it would benefit you completely if you take up courses in a “flower school” and a crash course in business.

If possible, become an apprentice at one of the local flower shops in your community. Having first-hand experience gives you the tools to face issues like flowers dying early, pests, and so on.

6. Location

If you’re planning to set-up a brick-and-mortar floral store, location is pretty important. Your house should be in a busy area or near a hospital, mall, event venue, graveyard, funeral home, and other similar establishments.

However, if you’re not planning on setting up an actual “storefront,” then location shouldn’t be an issue. You can use any vacant space in your home, connect a computer and landline for orders, tend to the flowers, and run the business totally from inside your house.

Some people even start their home based floral business from within a moving vehicle, such as a van.

If this seems like something you’d be interested in, look for possible vehicles you can use.

7. Equipment

Storefronts would require display racks, tons of flower buckets, water hose, and refrigerated cases to extend the shelf life of your flowers.

If you’re not going the storefront route, you’d still need equipment to keep your flowers fresh.

You also need a way to transport your products. Many flower shops invest in either a motorcycle, car or van because relying on third-party delivery can be costly.

8. Initial Stock

The amount of initial products you stock your home-based business depends on how big you’re planning to launch, or the business model you plan to follow (made-to-order vs. storefront).

Do you want to accept flower arrangement during weekends and slowly expand your business from there?

Do you want to open up a flower shop complete with all kinds of flowers?

9. Extra Funding

If, for some reason, you need extra funding to start your business, you can explore government-backed loans, crowd-funding (such as Funded.com, Kickstarter, GoFundMe and other similar sites) or peer-to-peer lending (like Funding Circle, or Peerform)

10. Marketing

Every business has to let the world know it exists.

Because you’re just starting out, you can start with simple marketing such as building your online presence through social media.

If you have a storefront, you should also work simultaneously to win over customers with your pleasing personality and customer service skills. You’d be surprised by the power of the traditional “word of mouth. ”

This is the part where you get creative for your business to stand out.

If you’re planning to run the entire thing in the shadows, how about creating a website and promoting a flower subscription box for your city?

Going Slow vs. Launching Big

If you’re looking for other businesses you can start from home, such as a clothing line or art shop, feel free to explore other guides on the blog. Those who feel they’re not ready for a home based business, but would love to earn extra cash from the comforts of their homes, this list of work-from-home jobs would be super-useful to you.

However, if you’ve already decided that a home based flower business is a perfect match for you, your next considerations are these:

  • Are you going to begin as a side gig or as a full time business? –
  • Are you opening a brick-and-mortar store, or only an online business?
  • What specializations do you plan to offer? (Floral arrangements, bouquet, red carpet events, funeral, weddings, subscription boxes, and so on)
  • How much will you price your products or services?

These questions would help you determine the initial startup cost and overall business plan, such as the need to rent a place, hire people, buy delivery van, and so on.

Know that setting up a home based flower business follows the same principles of starting a  traditional company from scratch. It would involve a lot of work, from beginning to end, so prepare for your body and mind for this one-of-a-kind experience, and good luck to your startup!

4 Things to Know Before Starting A Baking Business From Home

Do you spend hours in the kitchen dreaming up sweet confectionery treats and mindblowing savory delicacies? Ever wondered what opening your own bakery would be like, but you lack the startup funds? Don’t even think about taking out a second mortgage – just start a baking business from home!

Before you get started on baking and selling your first batch of goodies, however, there are a few things you need to know first:

Running a bakery from home involves setting goals, complying with regulations, and thorough planning.

Even if you’re not much into the business side of running a bakery, you will have to deal with these inevitable complications before you can get to the fun part: making all those tasty pastries.

I’ve already covered starting your own catering business from home, but now let’s get to baking.

Below, I’ve compiled everything you need to know to get your new home baking business off the ground. Whether you just want to take the occasional order and bake and sell goods on the side or transition into a full-blown baker, these tips will help you realize that dream.

The Reality of Starting a Baking Business From Home

There are a few things that need to be solved before you can start a baking business from home, from both logistical and legal standpoints.

I’ll start with the most important first…

1. Get the legal concerns out of the way first

This is probably the least exciting part of starting a business, but it is still essential that you take these steps before doing anything else.

Comply With Local Business Regulations

Getting to grips with all of the legislation in your country, state and local county can seem overwhelming at first, but it’s not all that hard if you do your research and work through the process methodically.

You could also consider creating a home bakery business plan.

First off, check to make sure whether it’s legal to open your business.

Some states in the US, for instance, don’t allow home bakeries, while others may prohibit certain goods (mainly those that need to be refrigerated).

To get this bakery going, you’ll need a business license that typically needs to be renewed every year. You may also need to have a sales permit (and/or various other licenses or permits) much like a meals-to-go business would.

The type of legal documents you have to acquire will depend on your local laws as well as the type of business you’re aiming to run.

For instance, if you have an area where people can sit and eat then you’ll likely have to obtain different permits than if you were to run a solely delivery-based bakery.

Keep in mind that you might have to pay fees when applying for licenses or permits, so budget ahead for that.

Get up to standard with food safety regulations

You may not be running a restaurant but you’re still working with food and that means food safety laws do apply to you too.

Getting a health and safety certificate will require that an inspector comes to your house to look around so they can make sure your kitchen is up to code. This naturally means that you have to have a sanitary kitchen and the right equipment, but could also involve modifying your kitchen area with commercial-grade upgrades.

Regulations usually aren’t as strict for a home bakery as, say, a restaurant, but there are still a few things that you’ll likely need to take care of. Make sure you prepare your kitchen before the inspector arrives.

Don’t forget about insurance

Like any other business owner, you should apply for liability insurance.

This will cover you in a number of ways, including if any of your clients get sick from eating one of your cakes (which hopefully never happens) or if any property gets damaged during the delivery.

You might also need to take out additional insurance depending on your situation, for instance, stock insurance can come in handy if you buy and store ingredients in bulk, and employers’ liability insurance is necessary if you decide to hire anyone to help you in your bakery.

Make sure to inform any relevant parties

If you’re renting or living on an estate then you may need to inform others of your decision to start a bakery, which can include a landlord or homeowners association.

Otherwise, you might be facing some hefty fines later on, should they have any rules regarding home businesses on the property.

Oftentimes, just talking to them about your plans should be enough.

2. Market Your Business Online and Locally

Your carefully crafted tarts might be the envy of the neighborhood and local bakers alike, but those goods are staying put without proper marketing.

Marketing might seem like another big, scary hurdle in your path (especially if you hate the idea of selling), yet it’s an extremely important part of your business.

Wow the Locals at events and fairs

A bakery isn’t a bakery until someone buys the first baked good.

Starting out, you’ll want to build recognition around your local community so the word about your business can start to spread.

Think about local events that you can get involved with, like fairs, festivals, bake sales, and parties. Really, any place where you can display and sell your baked goodies will work.

Consider letting people taste some of your creations for free as well to draw them in.

If the idea of putting yourself out there leaves you feeling uncomfortable, remember that the best type of marketing is word of mouth – and letting people see and taste your goods in person is your best shot at winning them over.

It won’t be as bad as you’re probably making it out to be in your head either.

After all, who can resist a sweet treat!

Home Bakery

Raise that online reputation

These days, promoting your business online can go a long way towards reaching potential clients and building a solid community of supporters, so it shouldn’t be ignored.

Bakers have more online outlets and platforms are available to them now than ever before and it’s much easier to get started than you’d initially think.

There are multiple platforms that allow you to quickly and easily set up your own website, and creating social media profiles for your bakery is easy as pie. Plus, you can get tons of inspiration from other bakers online too!

Social platforms that work well to promote your bakery on, include:

  • Instagram (This is a great place to show off snaps and videos of your delectable treats.)
  • Pinterest (Create some appetizing pins and share a few recipes that people can save for later.)
  • Facebook (Set up a business page and start promoting!)
  • YouTube (You might not have ambitions for your own baking show, but if you’re ever up for recording a few tutorials then this is the place to put them.)

3. Plan orders ahead and organize your kitchen

Running a successful home bakery comes down to meticulous planning and proper organization.

Especially as you get busier and have to juggle multiple orders a day, which makes it just that much easier to get confused and mess up an order or miss a delivery.

4. Keep close track of the finances

If pricing your cakes wasn’t hard enough, every year the taxman rolls around and there’s no avoiding him either.

It’s crucial that you keep track of all your income and expenses for when you have to file your taxes.

If this is a potential problem area for you then try using business accounting software (there’s plenty available online) that can help you manage your finances.

Remember to keep all your receipts as well in case you need to provide proof for your tax-deductible expenses.

And make sure to file the right tax forms, depending on whether this is your full-time job or a side income.

The Future of Home Bakeries

Setting up your own baking business from home can be challenging but it’s all worth it if you get to do what you love for a living.

As your business grows and your sweet or savory baked goods get more popular, you might even start to consider selling them at local supermarkets – now isn’t that a treat!

6 Best Budget Apps To Download On Your Phone Today

“Where is my money going?!”

“I really need to save money.”

“I need a budget.”

How many times have we all said this to ourselves?

Luckily, we live in a time when there’s an app for everything, even budgeting our cash.

In today’s article, we compiled all the best budget apps for various budgeting needs.

The Best Budget Apps You Can Download

There are plenty of techniques and practices to save money.

But having a mobile app at your fingerprints to help you achieve your financial goals is convenient and helps you keep your eyes on your goals.

Here are the best budget apps you can use.

1. Mint

Mint.com Website

This app is one of the oldest, most popular, and most highly ranked budget apps.

Three reasons: it updates in real-time, it manages multiple accounts, and it’s free.

It remains the yardstick by which all new budget apps are measured.

Mint is a free budgeting app that allows you to manage your money and accounts all in one place.

With Mint, you can manage all your bank accounts, investment accounts, credit cards, insurance, bills, and loans in one place. They all get updated in real-time.

Your transactions get automatically categorized, and although the categorization algorithm is a bit flawed, it’s still helpful to have an idea of where your money is going.

You can even split ATM transactions into what you purchased or paid for with that cash.

Based on your spending patterns, the app also creates a budget and lets you know how much you should spend on a category. Of course, you can always edit this budget according to your actual income and needs.

When you start exceeding this budget, the app alerts you to it so you’re aware.

They also provide your credit score for free and present it such that there’s no unnecessary information that may confuse you. The information is sourced from Equifax and you can update it every three months.

Perhaps the only negative thing one can say is that there are ads, but since the app is free, they’d need somewhere to get their operating expenses from.

Cost: Free
Best for: Beginners; those who want to see everything in one dashboard.

2. You Need A Budget

Another highly popular app, YNAB is one of the best budget apps you can use.

YNAB takes an envelope-based approach to budgeting, wherein every single dollar you earn gets allocated to a specific expense. This way, every single dollar is accounted for and you know exactly where your income is going.

More importantly, it doesn’t let you create a budget for money that you don’t have; YNAB forces you to live within your actual income.

This is good for those who are (or want to become) strict budgeters, as well as those who have made the decision to keep a close eye on their finances.

If you need more help budgeting, you can sign up for classes with a live instructor and learn good financial habits that will help you achieve your goals.

A big issue that users may have is the cost, which is more than a few dollars a month. But considering all the perks, and all the good habits you can potentially pick up, this cost is more than worth it.

Another issue is that it’s mainly a website browser-based application. But Android and Apple apps are available with which you can update your spending.

Cost: $6.99 monthly, $83.99 annually; 34 days free trial
Best for: Hands-on users who want a tight hold on their finances

3. PocketGuard

PocketGuard is probably the simplest app to use among all of these.

You can link your credit cards, bank accounts, investments, and loans to the app, conveniently giving you a view of your finances.

As you spend, the app updates and categorizes the transactions that you make to help you figure out your spending patterns; what you spend on the most and if there’s any category that you can cut back on.

Based on your spending patterns, PocketGuard can draw up a budget for you based on your income, bills, and goals.

They have a feature called “In My Pocket” by which you can tell exactly how much is safe to spend without sacrificing your bills, debt repayment, and savings goals.

Cost: Free
Best for: People who want a simple, no-nonsense approach to budget

4. Albert

Albert Website

If you want an app that allows you to squeeze out pennies from your dollars, Albert may be the app for you.

Albert works in the background, using its propriety algorithm to analyze your transactions and spending patterns to figure out how much money you can afford to save.

The app then takes small amounts that it “thinks” you won’t miss and transfers it to your Albert Savings, an FDIC-insured savings account that pays you 0.25% p.a. interest.

The algorithm also figures out when not to deduct any savings when your checking account risks going too low to handle your constant expenses.

Albert Genius is an upgrade for which you can pay whatever you want. This allows you to streamline your savings and make sound investing decisions guided by their financial advisors.

Cost: Free for Basic; Pay-what-you-want for Albert Genius
Best for: Users who want to set it and forget it

5. Mvelopes

This is another budgeting app that uses the envelope-based approach.

Mvelopes takes the cash-in-envelopes approach from literal to digital, because money isn’t just cash anymore.

Set up your envelopes, mark their purpose, and assign an amount. When the cash runs out, it’s gone and can only be reset on your next pay period.

They also have a comprehensive Learning Center. Subscribing to plans higher than the Basic Plan gets you a quarterly up to a monthly coaching session.

These features ensure that you learn financial habits that will last you a lifetime.

The only downside is that there’s a monthly fee, but considering what you’re getting, it’s more than worth it.

Cost: $6 monthly for Basic Plan, $19 monthly for Plus Plan, $59 monthly for Complete Plan; 30-day free trial
Best for: Users who are already comfortable with envelope-based budgeting

6. Personal Capital

Personal Capital takes budgeting one step further and delves into wealth management.

Aside from the usual budgeting app features, Personal Capital places more emphasis on your investments: how your holdings are performing and how your portfolio is doing against major market indices.

The app keeps track of your net worth and even the fees you pay to brokers, letting you know if you’re paying too much.

Depending on how much you’ve invested, Personal Capital also offers financial and retirement planning to grow your investments further.

The downside is that its budgeting functions aren’t as good as other personal finance apps that are available to download.

Cost: Free
Best for: Investors

Things To Consider When Choosing A Budget App

You’re probably interested in a few of the apps above.

But before you download apps from Google Play Store or Apple App Store and try them out, here are some things you need to consider.

Is it simple to use?

A few instructions should be enough to get you started with an app.

If you find yourself lost in a ten-minute tutorial just to begin using it, you might have the wrong app.

How much is it?

We tend to gravitate toward the free apps.

Who doesn’t like free stuff, right?

But paid budget apps may offer additional features that are useful to you that aren’t available in free apps.

Also, having to pay for the app is a financial commitment that makes you more inclined to actually use it.

Do you like using it?

We all have our personal preferences when it comes to apps, such as the look, colors, fonts, visual elements, etc.

And it seems petty to quibble over such minor details, but don’t take it too lightly.

If you don’t like the app, you’re not going to use it, and there’s no point in downloading an app unless you’re going to use it.

Budget Apps: The Bottom Line

Fortunately, we live in a time where we don’t need to keep bulky record books, maintain complicated spreadsheets, and place cash in different envelopes.

No app is perfect, and no app is perfect for everyone. You’ll need to consider your own situation, your goals, and what approach works for you.

Remember: The best budget app is one that helps you follow the basic rule: spend less than you earn.

Want more tips on how to save? Check out these 30 saving tips

Are you having difficulty sticking to a budget? Which apps are you interested in? Share your stories below!

Follow These Steps to Become a Loan Signing Agent

When this job opportunity became extremely popular a couple of years back, many people wanted to become a loan signing agent.

And why not? It’s an underrated position, but is deeply important in the real estate and home mortgage industry.

The job isn’t as popular as notary because unless you’ve obtained a loan for a house multiple times in your life, people only get to work with a loan signing agent at-most once in their lives.

But the job of a loan signing agent is actually very important. With him/her, no one would help borrowers sign contractor affidavits, reverse mortgages, refinances, purchases, equity loans or line of credits, seller packages, or quit claim deeds among other mortgage documents that regularly need to be notarized.

Notary vs. Loan Signing Agent

All agents are notaries, but not all notaries are signing agents.

Notaries and loan signing agents have similar roles:

  • They are there to witness the signing of documents
  • They cannot provide legal advice to people signing these documents
  • They cannot explain any part of the document
  • They ensure rules regarding the signing of documents are met by the people involved. (For example, some states require a borrower’s attorney present during the signing.)

Main task: Notaries witness the signing, signing agents walk the borrower throughout the loan signing process.

Length of paperwork: Notaries usually take care of only a one- or two-page document, while loan signing agents handle documents with 100 or more pages.

Fees: Notaries charge by the signature or stamp witnessed, while loan signing agents charge a flat fee (of about $50 to $300, depending on experience, demand and other factors).

How to Become a Loan Signing Agent

Mortgage companies, other lenders, as well as title and escrow companies hire loan signing agents to meet with customers and help them accurately complete paperwork with signatures, initials and notary stamps.

You don’t need a college degree to become a signing agent.

In most cases, you also don’t need experience, since once you’ve joined a network of agents, you can “win” a job based on how near you are to the loan signing.​​

Loan signing agent requirements:

Coursework:

Some states require you to undergo either an online/offline course to become a loan signing agent.

Like notaries, loan signing agents do not require special licensing, but they need an active notary commission, which is available at most states by just filling up an application form (or sometimes a quick test as well).

California, for example, has a 30-question test you’d need to answer.

Commission:

Your notary commission must be active.

Some commissions are valid for only 2 years, others can go as long as 10 years.

This depends entirely on which state you’re in. In Louisiana, notary commissions are valid for a lifetime. Some states have additional requirements for those notarizing digital documents.

Once you’re commissioned notary public in your state, you’ll have to obtain another certification on top of the notary public certification, so you’d be able to legally assist in signing mortgage paperwork.

Background check:

Because you’ll be handling sensitive information, most states and companies would likely obtain a background check before hiring you.

Unfortunately, you might have to shoulder the cost of background checks.

Again, this isn’t set in stone. It will depend on who is applying and where.

Printer and ink:

You’ll need a printer handy to be able to provide copies of loan agreements and other paperwork.

Insurance:

You are required to have errors and omissions insurance, especially if you’re starting a business or doing these assignments on your own.

Most escrow companies ask for $100,000, which boils down to only $150/year or $12/month.

Where to Find Loan Signing Agent Jobs

You can find loan signing agent jobs two ways: either you find your own, or get listed within a database and wait for a middleman to send jobs over to you.

1. Build Your Own Business

If you go this route, you’ll be skipping the middleman and getting jobs directly from mortgage companies, real estate agents, brokers, or escrow companies.

When you land a job, you’re paid around $150 (for more or less an hour-long meeting).

The cool thing about becoming your own boss is that you can expand your business whenever you see fit. Can you accommodate jobs outside your state? Do you want to bring agents into an office (that you’ll probably lease) or have them “on-call?”

Focusing all your energy in building a loan signing business from scratch is perfect if you’re eyeing for this to be your main career and source of income.

2. Wait for Referrals

You can also get your name listed on signing service providers (these are the middlemen that I was referring to).

Then every time a job becomes available near you, you will be called and asked if you wish to take on the assignment.

The payments for these jobs are lower, around $100 per appointment, since the service provider get a cut from the work you’ve done.

This route is ideal for people who are working as a signing agent as a side hustle and already have another career.

How Much Can You Make as a Signing Agent?

Once you’ve become a loan signing agent, your next problem is bringing jobs in.

If you’re doing this as a side hustle, the amount you make depends large on where you’re getting the jobs, as I explained just before this section.

Loan signing agents are paid much higher than notaries because everything they do prevent the mortgage industry from spending a lot more money if signatories make mistakes on the documents, delay funding, and other devastating results, such as borrower losing out on a home he’s trying to buy, escrow commissions being canceled, or mortgage company getting fired from a project.

Borrowers making mistakes on loan documents can be costly to all parties involved, so loan signing agents are paid extra to ensure this doesn’t happen.

  • Those starting out make $50 to $75 per document assisted
  • Signing agents who have been on the business for years can earn from $150 to $250
  • If you’re doing this part time and commit to only 1 job a day, you can earn an extra $250 every 5-day week and up to $1,000 a month.
  • If this is going to be your full time job (or you put up a loan signing business with other agents in tow) and you commit to 5 or 10 signings daily, that’s almost $2k a week and around $7500 a month.

How crazy is that?

Now let’s look at the demand… what’s the job outlook as a loan signing agent look like?

The Future of Loan Signing Agents

The demand for loan signing agents might seem like a fad, since it peaked a couple of years ago, then went back to regular shortly after.

But as of today, these agents are just as important as brokers and mortgage agents.

Notarization is a process used by lenders to deter fraud and prevent forged signatures on important documents and records such as home loan paperwork.

Signing agents will be an important part of the home loan process for as long as mortgages are signed traditionally.

It is safe to assume that when state laws catch up to technology advancements, online notary services will reduce the demand of loan signing agents, since the job will be done remotely (probably via webcam, electronic notary stamps, and electronic signatures).

But for now, signing agents still need to walk a homeowner through a set of loan paperwork in person, and if you’re late to the party, there is still time to earn money through this profession.

Steady App Review: How to Find Side Gigs from your Phone

This Steady App review explores the world of on-demand work and freelancing either online or in real life and how this new tool can benefit you, even if you’ve just joined the gig economy.

Steady App may be a newcomer, but it can be a game changer.

How so?

What is Steady App?

Steady app is the creation of Adam Roseman and his partners Michael Loeb, and Eric Aroesty.

The idea came out of the experience of Roseman’s own 71-year-old dad, who was living off his small retirement fund that led him to move to Georgia due to lower cost of living.

Roseman had to step in and help him find flexible jobs that would fit his skill set, location, and passion.

Adam Roseman then partnered up with Loeb and Aroesty, pitched it as a startup at the Fintech71 ten-week accelerator program in September 2017, and won the Startup Pitch competition at Money 20/20.

By April 2018, the Steady App was launched and has attracted not only almost $10 million in investment, but also the attention of NBA icon Shaquille O’Neal who is now the company’s “advocate.”

You can download the app through the official Steady site and look around from there.

What Types of Gigs Can You Find on Steady App?

There are two kinds of jobs you’ll find here: the work-from-home ones, and real life ones (the jobs you have to go in person to perform the tasks).

Majority of the gigs listed here are seasonal, part-time or can even be a one-time thing, but what makes Steady app interesting is that it aggregates all the gigs from other companies into one app.

This means Steady doesn’t really hire you for these jobs, but just serves as a platform to help people looking for legitimate side hustle opportunities.

Here are some samples of gigs you might find on the Steady app:

  • Work-from-home: online teaching, tutoring, virtual assistance, customer service, transcribing, graphic design, research, and so on.
  • Part-time or full-time: Care giving, pet services, tech support, store clerk, freelance writing,
  • On-demand gigs: Shopping and delivering groceries for other people, event hairstylist

You can also filter jobs based on your location, availability, and interests.

How to Use Steady App

Whether you use the website, Android app or Apple app, finding gigs on Steady follow mostly the same procedures:

  • Create your account
  • Enter your zip code to see jobs near you.
  • Choose from the four options: “work from home,” “anytime work,” “part-time & full-time work,” and “recently added work.”
  • Check out the opportunities available. Click one job and you’ll see the following information:
    • Job activity – type of activity (such as retail or customer support)
    • Job details – lists tasks, and other details about the job
    • Pay insights – Amount you’ll be earning
    • What you need to apply – Application requirements, such as age, educational attainment, experience, and so on
    • Opportunity insights – States who are ideal for the job
  • Click “apply” and you’ll be directed to a third-party company, confirm that you’re applying for the job and click “continue” to get started.

If, for example, you pick a “caregiver” job from Care.com, the Steady app (or site) will bring you to the Care.com site.

From here, you can choose to end your relationship with Steady, leaving all your communication, job details and income between you and Care.com (or other companies you land into).

3 Reasons to Stay with Steady App

Steady App

You might be thinking why on you’d still include Steady app into your side hustle world after landing a gig.

Even Steady isn’t forcing you to stay with them. However, here are 3 reasons you might want to keep all your gigs under Steady:

1. Track Earnings

This is the biggest reason to keep using Steady even after getting the job.

You can keep track of all your earnings from various companies since you began side hustling.

You do have to enter your bank account first.

Steady will then give you a super-helpful dashboard that will help you monitor your income streams (if you’re doing two or more jobs at a time) and total earnings each month.

2. Benefits and Boosters

The Steady app gives you other opportunities to earn or save money through the app. For example:

  • Get $50 from Steady after making your first DoorDash delivery
  • Get tax deductions from working with two or more Steady partners
  • Save up to $800 on insurance with Gabi
  • Obtain refunds from bank fees
  • and so much more.

What’s more is that all these savings and deals can be seen straight from the app.

You don’t have to fish promos from other sources anymore, thus saving you time that you can use to earn more cash.

3. Community-friendly Features

When Steady app launched, the company emphasized on the power of community and how this app could be the go-to place of people in need of odd jobs.

Check at the bottom navigation bar and you’ll find a resource center with tons of information about building your income, winning in your newfound careers and other finance-related tips from publishers like Dave Ramsey, Financial Panther, HerMoney, and more.

Aside from the features it has now, such as the activity feed that lets you see when new gigs are added in real time, Steady plans on bringing other community-oriented features to the app.

So, what’s the Catch?

Yes, the Steady app is 100% free.

So how does Steady make money? What’s the catch?

Here’s the good news to users worldwide: there’s no catch.

Steady makes money by referring workers like you and me to companies like Care.com, Postmates, and so on.

Steady receives commissions from all the talent directed to these companies, which isn’t a bad thing, since Steady helps people in the process.

The only disadvantage to this lead-generation/affiliate model is that other companies they partner with, such as Guru.com, may not be 100% suitable to Steady’s categories and can be confusing to applicants.

How Much Money Can You Make with Steady?

The amount you can make with Steady depends largely on the time you commit to do these jobs and the number of opportunities you pursue.

Jobs on Steady range from $10 an hour up to $25/hour, while some jobs let you set your own salary rate.

With this amount in mind, a part-time worker making an average $15/hour at 20 hours a week can earn up to $300/week or $1200/month.

A full-time worker with the same hourly rate can make $600/week or $2400/month for a 40-hour weekly workload.

If this is going to be your main income, I recommend you skip microtask jobs like surveys, get-paid-to and so on. Instead, stick with part-time and full-time jobs you can do online or near your location.

Wrapping up this Steady App Review…

The Steady app can be very useful for several specific groups of people, such as:

  • College students and newly graduates – Getting relevant experience from your career of choice can be hard because of the low pay, but supplementing it with income you get from opportunities referred by Steady app could solve your dilemma.
  • Stay-at-home parents – Taking care of kids is hard, but if you need to earn extra money but cannot get a traditional office job, let Steady app help you find legitimate work from home gigs.
  • Retirees or those switching careers – It can be hard to transition from a career you’ve had for years or decades, but Steady app can guide you in choosing which side hustle would fit your skill set. It’s up to you if you want to turn these gigs into a full-time career, or say goodbye to them once you’ve found a better opportunity.

Of course, Steady app can help anyone who needs extra cash. You can be setting up a business and need income while you build it from scratch. You can be someone who is trying hard to make ends meet. It doesn’t matter. As long as you’re willing to do the job assigned, there’s no limit to your earning potential.

Steady App Pros and Cons

The app is user-friendly, easy to join, quick to find work, and has a well thought out design with good search and filtering features.

It’s also 100% free and have hundreds of opportunities for you to start with – and they’re all in one app.

No more wasting time searching through several sites for legit gigs. Steady has already checked and vouched for most of the jobs here.

The extras (deals, savings, income tracker) are enticing enough to continue using the app, but what I like most about the Steady app is how the job details include income potential. This is something not available in many online job marketplaces and I appreciate that it’s listed for every gig.

My main concern about this app is that I have to apply to every gig separately, externally onto another site or app. You need to fill up another form, create a new profile, and perform other steps to reach the application form.

It can be daunting if you’re sending applications to multiple companies at a time.

To wrap up this Steady app review, I believe the benefits outweigh the disadvantages of using Steady, so if you’re new to the gig economy and is feeling a little lost, this app could be your life changer.

As always, browse our complete list of work at home jobs to find one that’s best for you.

15 Easy Ways to Earn Amazon Gift Cards Online

Everyone likes discounted stuff, so why would you ever pay full price for something on Amazon when you can earn free Amazon gift cards?

In the current age of online shopping, we’re all trying to figure out how to get free stuff. Discount codes. Referral bonuses. Gift cards.

It’s practically like getting free money.

(Psst. Have a birthday coming up? You just hit the jackpot with this list of 200 free things you can get on your birthday.)

And here’s a little-known fact for you:

There are a lot more ways to earn Amazon gift cards than you’d expect.

Seriously, if you look up “how to win Amazon gift cards”, you’ll be met with hundreds of options. And I’ll be honest with you – it gets overwhelming.

So the question is:

Where can you get those free Amazon gift cards and how can you take your shopping experience to the next level?

What it Takes to Earn Amazon Gift Cards

For starters, no one is just going to hand out money for free.

With that in mind, you will need to exchange something in order to earn Amazon gift cards.

In most cases, you will need to share personal information about yourself (eg. your demographics, your shopping patterns, past purchases etc.) and companies will pay you to gain access to this information.

Other sites listed below ask that you fill out surveys or answer questions. Basic work that nets you a reward.

With that in mind let’s check out…

15 Ways to Earn Amazon Gift Cards

I’ve compiled the top 15 ways you can earn Amazon gift cards online, so you’re not overwhelmed with hundreds of choices!

Below, you’ll find the best of the best.

1. Swagbucks

Swagbucks signup form

First things first:

When you sign up to Swagbucks you get $5 for free. It’s one of those websites that pay you for pretty much every task imaginable too.

Firstly, you earn SB points whenever you continue a task (watching a video, answering a survey, doing some online shopping).

Then, you can redeem those SB points and earn Amazon gift cards (or cash via Paypal). You can do this from the comfort of your own couch and it’s free.

300 points get you a $3 Amazon gift cards, and you can redeem with as low as that. You’ll find that other websites usually allow you to redeem a minimum of $10 or $20.

The cherry on top?

Amazon gift cards can actually get discounted at Swagbucks. So not only can you earn Amazon gift cards for doing minimal work, but they can also be redeemed for a lower cost.

2. Ibotta

ibotta earnings

Ibotta is one of the best (and easiest) ways you can get free Amazon gift cards.

You pretty much have to do nothing (no answering surveys, no watching videos, no doing any tasks) to earn your Amazon gift card.

So what do you have to do?

Well, activate an offer and scan your grocery receipt.

Yes. That’s it.

This cash back and rewards app allows you to find the best deals by browsing through different stores.

This is how it works:

  • Before going to the store, open the app.
  • Check all the available offers at that store.
  • Add them to your account.
  • After arriving back home, take a picture of your receipt.
  • Withdraw your earnings (through cash or winning an Amazon gift card.)

3. Honey

Honey is a browser extension that also lets you earn Amazon gift cards. Here’s how you do it:

  • Activate a Honey Gold shopping session. This is done through the browser extension that you download.
  • Purchase something and earn Honey Gold points.
  • Collect enough points.
  • Redeem those points as Amazon gift cards.

You can also make 500 points just for referring another user. 1000 Honey Gold points are usually equivalent to a $10 gift card.

Could it get any easier? I think not!

4. Check Wikibuy to earn Amazon gift cards

Wikibuy instant

This is another browser extension that you download (usually works with Chrome & Firefox).

The extension not only allows you to earn points and win Amazon gift cards, but it also helps you find the top coupon codes, alerts you when sales are on and helps you find the best prices.

Aside from redeeming your points as Amazon Gift Cards, you can also use the extension to notify you when you can find a product at a lower price somewhere else.

5. Shopkick

Shopkick has eight different ways you can earn rewards, and we’re here for it! You can earn points (called Kicks) on the website by:

  • Entering a store with the app open.
  • Scanning barcodes of some products.
  • Make purchases with the card that you’ve linked to the app.
  • Scan your receipt (on featured items)
  • Visit online stores & buy products.
  • Watch videos.

These are all the different ways you can earn Amazon gift cards on Shopkick.

6. Mobee

What I love about Mobee is how much fun it is.

The whole idea is that the app assigns you different missions to complete at stores (all undercover, of course) and you win Amazon gift cards in return.

It adds a little fun to the process, instead of answering a survey or watching a video.

7. Drop

Drop is another app that gives you rewards for shopping at specific stores. The best thing about the app is how easy it is to use. You don’t even need to open up the portal whenever you shop. You can forget all about it.

Here’s how you can get your Amazon gift card:

  • Sign up on the app.
  • Link your credit or debit card.
  • Select 5 different stores (merchants).
  • The merchants have different rates (the number of points you can get for every dollar you spent.) Some of the shops include Uber, Target, Starbucks, and Walmart.
  • You can redeem your drop points in the form of Amazon gift cards.

8. Receipt Hog

Receipt Hog website

You can use Receipt Hog to get points for snapping a picture of your shopping receipt.

What makes this app different is that you don’t have to be at a specific shop or buy a specific product.

9. PrizeRebel

Complete offers, answer surveys, watch videos and do some more tasks to get free Amazon gift cards on Prize Rebel.

They have a much lower redemption level than some of the apps mentioned here, where you can literally cash out 200 points ($2 gift card).

That shouldn’t be hard, should it?

If you want to make even more points, you can refer other users to the app and then make 20% of what they are making!

The more points you make, the higher your referral percentage gets. It can easily reach up to 30%. It’s a great source for passive income.

10. Survey Junkie

Survey Junkie

Survey Junkie is renowned around the world for helping you make money fast.

This website has a massive inventory of all types of surveys that you can take. 1000 points equal $10 that you can either cash out or get in the form of free Amazon gift cards.

11. BeFrugal

BeFrugal’s whole point is to give you cash and coupons. You can definitely earn Amazon gift cards.

When you shop at stores like Walmart, Amazon, and Ebay you can get cash back in the form of either cash or Amazon gift cards. You will even get a 1% when you choose the Amazon gift cards option.

12. Checkpoints

Take quizzes, shop online, complete surveys or watch videos to earn points on Checkpoints.

Once you get enough points, you can redeem them in the form of free Amazon gift cards.

13. Inbox Dollars

Inbox Dollars is another website where you can take surveys, take quizzes, shop online, play games and more to get “rewards” and points that you can redeem as free Amazon gift cards. You can even test products!

When you reach a balance of $30, you’ll be able to redeem your Amazon gift card. If you want to make money there faster, I recommend referring a friend, since you get $1 and 30% of what your friend makes.

14. Personal Capital

Personal Capital is an incredible app overall.

This financial app can easily be one of the top money apps right now, as it doesn’t just allow you to track your financial situation (cash flows, what your budgets are likes, the performance of your investment) but it also gives you $20 Amazon gift card when you sign up.

15. Earn Amazon Gift Cards from Amazon

Yup. You can earn free Amazon gift cards from Amazon themselves! If you sign up for their Amazon Rewards Visa Signature Card you can get a hefty $70 bonus.

The only thing you will need is a Prime account. The perks are worth it though:

  • A $70 Amazon gift card.
  • 2% off at select restaurants and drug stores.
  • 5% cash back on all your Amazon restaurants.

How do you Earn Amazon Gift Cards?

Have you used any of the sites listed above? If so, what one is your favorite? Let me know in the comments below.

Those websites and apps are all convenient, flexible and are guaranteed to help you earn Amazon gift cards.

They’re all legit, need little to no effort, and help you get quick money! If you want to know more about how you can make quick money online, check out this article.

Here’s How to Recover Your Poetry.com Articles

Update: Are you trying to recover your poems? In April 2018, Poetry.com appeared to have stopped working.

Nearly a year and a half later, the site is still down, but there is now a splash page in place.

Poetry.com

I’m not sure what happened to the original Poetry.com, but if you tried to visit the site in the past, you would have seen the following error:

“Error establishing a database connection”

This is actually incredibly easy to fix, and the fact that it has remained there for years leads me to believe that Poetry.com has been abandoned, taking all of the poems posted there with it.

How to Recover Your Poems

I’ve come up with an idea that I think MIGHT work. I say MIGHT because I do not have any poems posted there and this is just all speculation.

Please, if you try this method and have found it to work, leave a comment below to help pass the news along to others.

Try this: Open up Poetry.com at Archive.org

Poetry.com at Archive.org

Archive.org takes snapshots of every single page on the Internet. They have approximately 461,880 pages saved from Poetry.com over the past 21 years.

I suggest picking a date near the mid 2017 as they were the most likely to load for me and see if you can find your public profile.

How to find missing poems

You WILL NOT be able to log in to your old account. Remember, this is just a snapshot of what the website looked like at a certain point in time. It is NOT a functioning website. The search feature will NOT WORK either.

You can also try opening poetry.com/poems/ to see the full list of poems.

If you happen to have a URL bookmarked where your poems were once stored, plug that URL directly into Archive.org instead.

This will be your best chance at recovering your old content.

I’m very sorry that you may have lost your hard work. I do hope you’re able to recover it.

Please let me know how it works out in the comments section below.

The rest of the article is the original article published here in 2009.

The most successful scams are the ones that appeal to your emotions.

They assure you that you can be better off than you currently are. Success, fame and fortune is just a click away.

Odds are you will be clicking away some of your money while receiving nothing in return.

Poetry.com is no different.

The Scam Behind Poetry.com

Poetry.com allows you to submit your own poetic material for consideration in their international poetry competition.

In order to enter the contest, you have to also include your name and address.

Within days of submitting your poem, you will receive a letter in the mail praising you and your poetic ability.

Now to an unpublished author or someone looking to get started in this line of work, receiving a response is quite an accomplishment in itself, but to receive a response not only praising you for your work but naming you one of the best authors to ever submit a poem is extremely flattering.

The letter will also inform you that you have been chosen by a select panel of judges to be published in the next volume of poems put out by Poetry.com.

This is where the upsell begins as it all goes downhill.

In order for your work to be published, you have to purchase the book.

This isn’t stated, but it is indeed true.

Naturally, if you’re an aspiring writer, you’ll want to purchase a copy of your first published work.

Hell, you might end up buying a copy for your parents, significant other, friends, etc. The only thing is, the book costs anywhere between $50 and $75 or more if you want your poem on a single page.

After some time you will be given the option to buy a CD that includes your poem in a reading and you’ll even be invited to a convention where you’ll be awarded with some cheesy trophy or plaque.

Again, this is all at your expense.

This probably doesn’t sound all that bad right?

Wrong.

It’s terrible.

Poetry On-Demand

Poetry.com only sells these books to the people who submit the poems for their inclusion.

The books aren’t sold anywhere else in the world.

Anyone could write anything at all and Poetry.com will hail them as the next Shakespeare and tell you you’ll be included among prestigious poem anthologies.

Previously, 20/20 did a news report where they had a class full of second graders write poems for the site.

Every single poem was accepted by their judges.

Poetry.com is making between 50-60 of these books per year with about 6,000 poems in each.

Given that the book costs about $75, they are making over $22,000,000 per year on book sales alone!

They give away one annual prize of $10,000 per year or about 0.0004% of their annual book sales. These guys are disgustingly cruel.

Fun with Poetry.com

Just to prove my point, I submitted this lovely piece entitled ‘Bird.’ It is a Steve original and I fully expect to win the $10,000 contest prize.

A bird sits on a windowsill.
Howl goes the wolf.
The bird flies away.
A pie replaces the bird.
The wolf steals the pie.
Pie wolf and bird meet in the woods.
Pie is had. All is good. The world is happy.

Immediately upon submitting my poem I was hit with an upsell. I could have my lovely poem engraved on a beautiful plaque for just $39 plus shipping!

What a steal.

I didn’t want to jump the gun and get this bad boy engraved right off the bat. I want to wait until it wins the $10,000 prize.

Since I chose not to purchase the plaque, the only other available option was to view “Special Offers” that were personally chosen for me.

Of course, this was all garbage as they were trying to collect my personal information to sell to companies.

Continuing past the special offers leads you back to the main page. There is no substance behind Poetry.com.

The site exists to gather as much of your personal information as possible in order to try and sell you garbage.

I’m anxiously awaiting my acceptance letter. I’ll be sure to post it as soon as I receive it.

In the meantime, see how you can actually get paid to write poems instead.

9 Companies that Give Away Free Shoes by Mail

Who wouldn’t grab the chance of receiving free shoes by mail, right?

It may sound like a marketing scheme, but people have actually been getting free sneakers from popular brands like Nike and Adidas for years.

This program is called product testing, which is often part of a company’s R&D process to collect feedback about a consumer’s preference and reactions on a particular product.

So, am I just given free shoes right after sign-up?

Not quite.

The Catch: How to Get Free Shoes Straight from Company Factory

Most big companies, such as Nike, have a web page that lets consumers sign up to get paid to test products.

Once you enter your information, your name becomes a part of a database of consumers.

Depending on the company’s current promos and line-up of products, the company will then launch a product testing campaign for an assigned number of people and certain demographic.

For example:

  • 100 male, 30 to 40 years old, weighs over 250 pounds
  • 50 male, 50 female, all under 40 years old, participating in a marathon in the next 3 months
  • Flat-footed people, any age, can wear the shoes an hour daily for 6 months

Simply put, if you don’t fit the demographic a company requires at the moment, you won’t be given free shoes.

If you’re not chosen right now, this doesn’t mean you are also disqualified for other campaigns. A particular sports brand conducts multiple product testing campaigns each year, so don’t lose hope.

9 Companies that Give Away Free Shoes

I didn’t include Nike here, because I wrote about Nike product testing programs extensively in the past. If you want free Nike shoes, see how you can get a pair here.

Note that product testing isn’t exclusive to the sports clothing industry, but since we’re talking about free shoes, here are 9 companies that you should definitely sign up for:

1. ADIDAS

Fill out their personal details form to get started.

Don’t worry, you don’t have to pay a cent and it only takes a few minutes to apply as a product tester. But you do have to qualify.

Once Adidas begins a new study and choose from its database of potential, the company will send an e-mail telling you that you were chosen to participate.

All other details will be included in that invitation.

After confirming that you want to join, Adidas will send you your free shoes (or clothes) in the mail.

Read the instructions. Here you’ll learn if you need to give back the shoes, or keep them for yourself forever. Adidas usually requires you to take down notes (ex. 1 hour jogging, September 18), and answer a questionnaire online at the end of an assignment.

2. Brooks Running

Brooks Running testers

Brooks Running give shoes, apparel, and sports bras to runners for testing in the real world, which are added to their running research data and helps them improve on their existing products.

Two types of testers are available: one who can get tested at the “lab” in Seattle, Washington, and the wear tester (who can be from anywhere in the US).

Brooks Running will pay for two-way shipping of the products to/from your home, but you have to agree to provide feedback and return the product when asked to.

You won’t receive any money for this though.

If you apply and you don’t hear from Brooks Running, don’t fret. You are already in the Brooks Product Tester database and have a chance to be sent an invite once the right opportunity for you appears.

3. New Balance

To join New Balance’s program, enter your e-mail address and create a profile so the company will know more about you.

Submit the form and you’re now part of the New Balance Tester Community database.

New Balance also chooses based on demographics and interests. If you’re chosen, they’ll notify you first before sending a new prototype by mail.

Go to your profile online, follow the assignment instructions, and submit feedback.

Sometimes, you don’t need to return the shoes.

4. Reebok

Reebok boasts the reason their footwear and apparel truly meet people’s athletic needs is that they test footwear and apparel on REAL ATHLETES.

Here’s where you come in.

If you’re physically active and want to join the product testing program for free shoes and clothes, fill-in details like shoe size, location, activity level, and so on.

Product testing lasts 3 to 6 weeks, but Reebok will ask you send back the products after testing.

5. Red Wing Shoes

If you love boots and other rich work shoes, Red Wing Shoes is looking for product testers interested in wearing their products on the “toughest, dirtiest and hardest-working situations.”

The requirements change from time to time.

When I checked, they were looking for testers in the Minneapolis/St.Paul MN area with specific feet sizes.

Those who are qualified can fill-out the application form to the side.

What’s cool about Red Wing Shoes is that the boots are yours after testing.

6. Puma

Back in April 2019, Puma launched its beta tester program for its self-lacing training shoe Fit Intelligence (Fi) for select countries.

Watch out for more Puma product testing, since the FI training shoes were the first one.

7. Saucony

Try out running shoes and athletic gear for free. Fill out an application form to become a product tested.

A bit of warning though: the form is super-extensive and digs in about your history as a runner. If you’re not a runner, better skip this program and go with another one.

Saucony tries to find testers that will really use the pair of shoes for running (you’ll be asked a comprehensive survey after you complete the task).

8. Columbia Global Performance

Columbia is actively inviting a broad range of people to test out their products. The company prefers those who love the Great Outdoors or is into sports.

Just apply to become a tester, get accepted into the database, pass the eligibility requirements, and get a chance to test either a pair of hiking boots or running shoes and submit feedback.

Columbia Product Testing

Columbia’s testing program is a bit unique – they’ll give you a set of tasks to complete throughout the testing period.

Unfortunately, you do have to return the free shoes after a couple of weeks.

They shoulder two-way shipping fees.

9. Under Armour

To join the Under Armour testing community, simply enter your name and e-mail address, then fill out your profile.

Like other product testing processes on this list, you have to qualify (based on your demography and profile info) to join the current program.

It’s free to join the testing program, but hard to get in.

If you’re lucky enough to get picked, you’d have to follow the instructions included in the package with free shoes.

There’s no cash prize here as well and you’d have to send the product back at the end of your test.

Get Other Free Stuff by Mail

When you’re chosen to be part of any of these programs, be honest with your feedback.

The company needs that honesty to improve upon the free shoes you’ve just tested before the official release.

If you’re a fan of Amazon, they also have the Amazon product testing program you can join – and they cover a wider range of products.

Now that you’re introduced to getting free shoes, why not explore other things you can get for free like baby stuff samples, birthday freebies, or other kinds of free samples by mail.